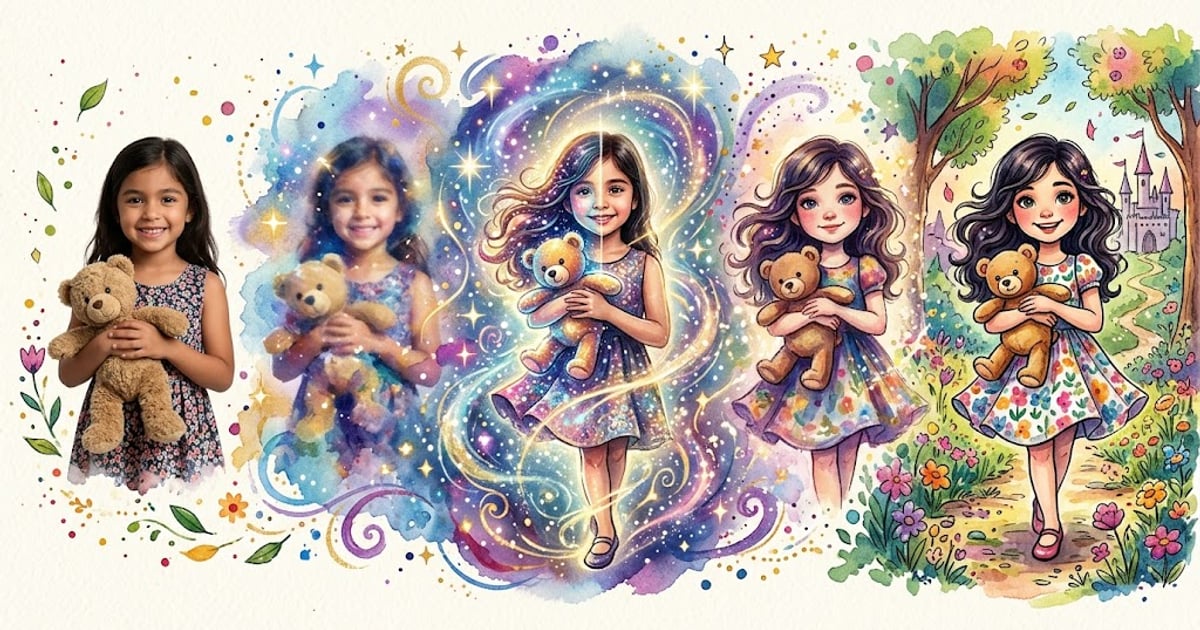
You can turn your child's photo into an illustrated storybook character in under ten minutes — no drawing skills, no design software, no waiting weeks for an artist. Upload a single photo, pick a style, and AI handles the rest. The character looks like your actual kid and stays consistent across every page of the book.
This guide walks you through the entire process step by step, from choosing the right photo to exporting a finished storybook you can share or print. I've created dozens of books this way, so I'll also cover the mistakes that waste your time and the tricks that make the biggest difference in the final result.
Key Takeaways
- A single clear photo is all you need — the AI converts it into a character description that drives every illustration
- Photo quality matters more than photo quantity: good lighting and a visible face beat multiple blurry shots
- You can choose from 55+ artistic styles, from watercolor to anime to storybook classic
- The full process takes 5–10 minutes from photo upload to finished storybook
- Your child's photo is never fed directly into the image AI — it's converted to a text description first for privacy
Step 1: Choose the Right Photo
The photo you upload is the single biggest factor in how well the storybook character matches your child. Everything else — the story, the art style, the customization — builds on top of this first step. A great photo produces a character that genuinely looks like your kid. A poor one produces something generic.
Here's what to look for:
Face Visibility
The AI needs to see your child's face clearly. Choose a photo where the face is fully visible — no sunglasses, no hats covering the forehead, no hands blocking the chin. A straight-on or slight three-quarter angle works best. Profile shots (side view) give the AI less information to work with and tend to produce less accurate results.
Lighting
Natural daylight is ideal. Photos taken near a window or outside on an overcast day give even, shadow-free illumination that lets the AI read facial features accurately. Avoid photos with harsh overhead lighting (creates dark shadows under the eyes), flash photography (washes out skin tone), or backlit shots (face appears dark against a bright background).
Resolution and Focus
The photo doesn't need to be professional quality, but it does need to be in focus. A sharp smartphone photo is perfect. Avoid cropped screenshots, zoomed-in photos that look pixelated, or images pulled from video calls. If you can see individual eyelashes in the photo, the resolution is more than enough.
What to Wear
Clothing in the photo doesn't affect the storybook character — the AI generates outfits that fit the story's setting and theme. So don't worry about dressing your child up for the photo. What matters is that the clothing doesn't obscure the face or create unusual shadows.
Quick Checklist
- Face fully visible, no obstructions
- Even, natural lighting
- Photo is sharp and in focus
- Only one person in the frame (or crop to the child you want)
- Recent photo that reflects how your child currently looks
Step 2: Upload to StoryPic
Head to the story creator and upload your chosen photo. The process takes about 30 seconds, and here's what happens behind the scenes.
StoryPic doesn't send your child's photo directly to an image-generation AI. Instead, it uses AI character recognition to analyze the photo and convert it into a detailed text-based character description — things like hair color, eye color, face shape, skin tone, and distinguishing features. That text description is what drives the illustration engine. Your child's actual photo never touches the image model.
This matters for two reasons. First, privacy: the photo stays on StoryPic's servers and isn't shared with third-party AI image generators. Second, consistency: because the character is defined by a text description, the AI can maintain accurate likeness across every page of the book, in every pose and setting. A lot of competing tools struggle with this — the character looks different on page 3 than page 7. The description-based approach solves that problem.
After upload, you'll see a preview of the character description. You can review it and make adjustments if something looks off — maybe the AI read "light brown hair" when your child's hair is more of a dark blonde. Small tweaks here pay off across the entire book.
Step 3: Pick an Art Style
This is the fun part. StoryPic offers 55+ artistic styles that completely change the look and feel of your storybook. The same character description renders differently depending on the style you choose — watercolor feels soft and dreamy, cartoon is bold and bright, anime has that distinctive large-eyed appeal, and storybook classic looks like the illustrated books you grew up with.
Browse the full style gallery to see examples of each one. A few suggestions based on what I've seen work well:
- For younger kids (ages 2–4): Cartoon or storybook classic — bold lines and bright colors hold their attention
- For older kids (ages 5–8): Watercolor or fantasy illustration — more detail and sophistication
- For gifts to grandparents: Watercolor or soft pastel — these tend to feel the most "premium" when printed
- For fun and personality: Anime, comic book, or pop art — great for kids who are into those aesthetics
You can always come back and regenerate the same story in a different style, so don't overthink it. Try one that catches your eye, and experiment from there.
Step 4: Choose Your Story Type
StoryPic offers 17 story types that define the narrative framework for your book. Each type sets the overall arc — adventure, bedtime, educational, fantasy, and more. The AI generates a unique story within that framework, starring your child's character.
Some popular choices:
- Adventure: Your child explores a mysterious world, solves problems, and saves the day
- Bedtime: A calming story with a gentle narrative arc designed for winding down
- Educational: Weaves learning into the story — counting, colors, letters, or life lessons
- Fantasy: Magical creatures, enchanted forests, and fairy-tale settings
- Superhero: Your child discovers a special power and uses it to help others
Each story type also lets you set a moral or theme — kindness, bravery, sharing, perseverance. The AI incorporates it naturally into the narrative rather than bolting on a heavy-handed "lesson learned" at the end.
Step 5: Customize the Story
Once the AI generates your story and illustrations, you get to fine-tune everything. This is where personalized storybooks move beyond "insert child's name here" territory into something genuinely custom.
Edit the Text
Every page of text is editable. If the AI chose a word your child wouldn't know, swap it out. If you want to add a reference to their favorite toy or pet, write it in. Some parents rewrite entire pages to match their child's speech patterns — the illustrations still work because they're tied to the scene description, not the exact wording.
Add or Remove Pages
You're not locked into the AI's default page count. Add extra pages to expand a part of the story your child would love, or remove pages that don't add much. Most books work best at 10–20 pages, but there's no hard limit.
Stickers and Decorations
Add stickers, borders, and decorative elements to individual pages. These small touches make the book feel handcrafted rather than algorithmically generated. Kids especially love spotting stickers of things they recognize — stars, animals, hearts.
Multiple Characters
Want siblings, friends, or pets in the story? You can add multiple characters, each with their own photo and character description. The AI maintains each character's appearance consistently throughout the book. This is great for families with multiple kids — everyone gets to be in the story.
Step 6: Export and Share
When your storybook looks exactly the way you want it, you have several options for sharing and saving.
PDF Download
Export the entire book as a high-resolution PDF. This file is print-ready — you can take it to a local print shop, upload it to an online printing service, or print it at home. The PDF preserves all your illustrations, text formatting, and stickers at full quality.
Digital Sharing
Share the book digitally with family and friends. This is especially handy for grandparents who live far away or for sharing with your child's teacher. The digital version is interactive and can be read on any device — phone, tablet, or computer.
Read-Along Experience
StoryPic includes a read-along feature that narrates the story out loud while highlighting the text. It's perfect for early readers who are learning to follow along, or for bedtime when you want the app to take over narration duties.
Ready to Turn Your Child's Photo into a Story?
Upload a photo and get your first personalized storybook free.
Create Your Story Free →Pro Tips for Amazing Results
After creating dozens of books, here are the tricks that consistently produce the best results:
- Try the same story in 2–3 art styles before deciding. You'll be surprised how different the same narrative feels in watercolor versus cartoon
- Use a recent photo. Kids change fast. A photo from six months ago might not match how they see themselves now
- Read the story out loud before finalizing. AI-generated text sometimes has awkward phrasing that's obvious when spoken but easy to miss when reading silently
- Personalize beyond the name. Add references to real places, real pets, real friends. These details are what make kids light up
- Make it a series. Once you have a character set up, creating a second or third book is much faster. Kids love having "their own" book series
- Involve your child in the process. Let them pick the art style and story type. They'll be more excited about a book they helped create
Common Mistakes to Avoid
These are the pitfalls I see most often:
- Using a group photo. The AI can struggle to identify which person to use as the character. Crop or use a solo photo instead
- Choosing a photo with filters. Instagram filters, Snapchat effects, or heavy editing can distort the facial features the AI relies on. Use an unedited photo
- Skipping the character description review. Take 30 seconds to check the AI-generated description after upload. A small correction here prevents issues on every page
- Picking an art style before browsing the gallery. Don't just go with the first option. Check out the full style gallery — there are 55+ options and the differences are dramatic
- Not editing the text. The AI-generated story is a strong starting point, but a few personal touches transform it from "nice" to "this is my child's favorite book"
- Forgetting to save. Export or save your book before closing the editor. Your edits are preserved in your account, but it's good practice to download a PDF copy as a backup
Frequently Asked Questions
How long does it take to create a personalized storybook from a photo?
The entire process takes 5–10 minutes for a basic book. Upload and character recognition takes about 30 seconds. Story and illustration generation takes 2–3 minutes. If you spend time customizing the text, adding stickers, or experimenting with art styles, plan for 15–20 minutes. Subsequent books are faster because you can reuse existing character descriptions. Visit our FAQ page for more details on timing and the creation process.
Is my child's photo safe and private?
Yes. StoryPic converts your child's photo into a text-based character description using AI character recognition. That text description — not the photo — is what the illustration engine uses to generate artwork. Your child's original photo is never sent to third-party AI image generators and is never used to train AI models. The photo is stored securely on StoryPic's servers and can be deleted from your account at any time.
Can I include multiple children in the same storybook?
Absolutely. You can upload separate photos for each child, and StoryPic creates individual character descriptions for each one. All characters appear consistently throughout the book — siblings, friends, or classmates can all star in the same story. Each character maintains their distinct appearance on every page, which is something many competing tools struggle with.
What if the character doesn't look like my child?
Start by checking the character description that was generated from the photo. You can edit details like hair color, eye color, or other features to better match your child. If the issue is the photo itself, try uploading a different one — ideally with better lighting and a clearer view of the face. The art style also affects perceived likeness: realistic styles show more detail, while cartoon styles are more stylized by nature. Experimenting with a different style can sometimes produce a better match.
Ready to Turn Your Child's Photo into a Story?
Upload a photo and get your first personalized storybook free.
Create Your Story Free →